Wednesday, 1 June 2022

MAY 2022 REPAIRS

 So it is time to get the old Landy sorted to a more roadworthy condition. 
I've been going here there and everywhere in her for a fair few years now and only repairing stuff when it broke. It now needs a lot of "Welding" again. It must be around 10 years ago when I did extensive welding and then just the odd bit here and there as the years went by. Now it needs a bit more than just here and there. Idealy, it could do with a new Chassis, but this is way out of my pocket just now. 
It also needs some new springs as a few years ago I fitted the longer 1 Ton/Millitary type shackles. This gave it a bit of a lift with the springs looking flat. The old springs ride nice as they are well worn in, but they would allow the landy to come down on the bump stops. She needs a lift and the shorter shackles fitting along with some Parabolic Springs.

It is May 2022 when I've made a start on "Fixing Herup" and getting her back on the road. 

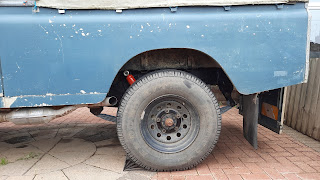
The Centre of the photo is a big hole needing welding.


The bump stop bolt had rusted through.


Spring Hanger rusted through.


Brakes are working but well-worn-down shoes are not going to last very long. 


Also fitted new Brake Cylinders. 
The old ones were seizing up and only working on one piston. 


There is always the one screw that just didn't want to undo. 
A bit of heat on it and a clout with the hammer and it came undone.


Shock Absorber is leaking and lost its bounce.
It is a white one and not a black one.
That is oil and muck all over it.


This Shock Absorber is working okay. 
😏


I'm now needing a cap like the one in the photo below.
It is the brake fluid reservoir Cap.
I need to doctor/modify it so that I can use an Ezee Bleed.
The caps that came with the Ezee Bleed don't fit the Reservoir. 


I'm going to remove the grill, etc., so I can get to the Electric Fan and change it. 
The old one has fallen apart.


The Hub Seal sits on the rearmost part and I change them a long while back. 
They still look good even though the seals have worn.


I didn't need to change the front cylinders as they were all working and weren't leaking. I just gave them a clean-up and replaced them. However, one of them needed a bleed nipple drilling out and replaced with a new one. 


A fresh load of grease going in on the bearings. 
I always pack a fair bit in just so there's enough to go around.


The bearing was good, so I replaced them back in.


Fitted new springs and Shock absorbers Front and Rears.


These are the old ones. 
They used to sit flat and I needed Military Shackles to give it a lift. 
It now sits on standard-length shackles.


It now sits a bit higher and level. 


This is a pile of Rust and Mud I dragged out of the Chassis. 
I have now ordered a New Chassis from Richards.


A total rebuild is coming soon. 
Watch this space. 😉


Sunday, 23 February 2020

Ignition Barrel.


Dodgy Ignition Barrel.

So, on Tuesday 18th Feb 2020, I get in the landy at about 0430 and head off for work. I get about 5 minutes drive away from home and the engine cuts out and the Landy rolls to a halt on a Roundabout near Sainsbury's at Sixfields in Northampton. First I check the fuse's because the Landy appeared to have no ignition and no starter. I thought, easy fix, we'll soon be on our way, but no. The fuses were fine and this got me puzzled. Now I'm thinking that a wire must have come to lose somewhere? So up with the passenger seat and check the battery terminals. All is good there, so now I'm really puzzled. 

Just now the police arrive and asked with a grin on his face, "Can you tell me why you have decided to park in the middle of a roundabout?" I just look at him and grin back and said, "The Car Park was full." They did offer help in asking if they could hold my torch while I fettled around. I really thought I was going to get going in minutes, but this idea seemed to be a NO, NO. 

Okay, now the police aren't convinced and neither am I in getting going anytime soon. So now I ring my Driving Agency and tell them what has happened and that I won't be at work for the foreseeable. I'm now ringing the wife and telling her to get her car warmed up, as the morning be bloody freezing with ice all over the screen, etc. While she was warming up the car and scraping the screen, I was walking home. The police said they would sit and wait till I get back. So within 20 minutes, I was back with a rope and the wife towed me home. 

I dumped the Landy outside the house and got in my Rover 75 and drove on to work. I've had a busy week at work and not had a chance to look at the Landy till Saturday morning, 22/02/20. 


I set to straight to the ignition barrel and I found this... 


The barrel has fallen apart, so no wonder the electrics weren't working. 

A friend, Russ Beck, offered a replacement from a 200Tdi Defender. Slightly different in the barrels, but they fit the column. 


The terminal wiring was a bigger size, so I had to try and find a bigger terminal fitting.
Just luckily, laying in a draw, was a section of heavy brown wire with a terminal fitting included.
I just cut and shut the wire with a block terminal and taped it up with electrical tape for insulation.

I fitted everything back together and,

Hey Presto, the jobs a Good'un.
We're back on the road again.


I have ordered another Ignition Switch and it's one that'll fit the original Ignition.
That should be with me shortly.


Thursday, 11 July 2019

Head Job

Head Job


So, for a while now, there has been a Knocking coming from the engine. I have asked several folks, in the know and have had several different answers. Some were saying it is the Vacuum Pump, Some were saying it is the Valves, Some were saying it is the Lifters. I was thinking along the lines that it might just be "Diesel Knock". A few had said that it could be Diesel Knock.

After checking the Valve Rocker Clearances (Tappets) were correct the next check I did was to pull the Injectors out. They all were very Gummed up with thick Black Carbon and also looked Oily. It was like the burning in the combustion chamber wasn't happening properly and had left unburnt fuel. It was seeing the injectors is such a state that I decided to take the head off. The Tappets did need adjusting, but I wasn't convinced that this was the problem. The Knock sounds more like it is one cylinder than all of them.

Have a listen to the video.


Here are the Injectors.
It's a wonder they actually sprayed any fuel evenly.


So after taking the Head off, things didn't look as bad as what I was expecting. The head surface wasn't bad, but the backs of the valves and the ports were quite bad, especially the exhaust valves. I put the head to one side and set to on cleaning up the Pistons.


Cleaning Carbon off is not as easy as you think. I finished up using Mr Muscle Oven Cleaner and WD40 along with an old Wood Chisel as a scraper. I also had some Scotch Brite as a scrubber, an old Tooth Brush and a Wire Wheel in a drill. The old Gasket was just as problematic to removed as it had welded its self to the head deck.


I used the old chisel and wire wheel on the deck to get the gasket off, but I needed a softer approach on the pistons. This is where the Oven Cleaner and WD40 come in. Spray it on and leave for a while and then scrap and brush and rub it off. Eventually, the Pistons and the Deck were clean.


Next thing to do was the Head. I removed the Valves to find the backs of the Inlets Gummed Up with Black Oily Carbon Goo. The inlet ports were good or should I say good'ish. There wasn't much crud about and this gave me a hint that the turbo was okay and not leaking oil. The Goo is the problem of having leaking Stem Seals.


The Exhaust Valves had plenty of Burnt on Carbon but cleaned up well on the Lathe. I used an Air Driven Die Grinder on the backs of the valves while they were spinning in the lathe.
I didn't take a photo of the backs of the Exhaust Valves, but to get the picture, they looked like the Inlets but burnt on harder.


I used the Die Grider to clean up the ports on the head. As said earlier, the inlets weren't bad and a few squirts of WD40 and a screwdriver to scrape away the crud, the ports came up clean. However, the Exhaust Ports were caked in crud.

It's a bit difficult to see in the photos but I'm sure you get the idea?
If you click on the photo, you'll get an enlarged photo come up before you.


Just started to clean this one.


I cracked on and clean everything.
 The carbon in the exhaust ports was absolutely caked on.


I lapped all the valves in and fitted new Stem Seals.


Here are a few videos to watch.


------------------------------------------------------------------------------

Here is the finished job done.
Head back on and everything torqued up.

I also removed the Vacuum Pump and blanked of the hole it sits in.


It started first turn of the key and ran as it should.
The Knock has gone and it sounds just right.

________________________________________
------------------------------------------------------------

We went away on Holiday down to Sixpenny Handley.
It never missed a beat all the way there and back.
No Smoke now either.
I'm much happier now it is back up and running like it should.
------------------------------------------------------------
MPG is up as well. The best I got when I first inserted the engine 3 years ago was 27mpg when towing the caravan. This last week or so with towing the caravan, the mpg is up to just shy of 30. The running around while on holiday without the caravan saw 35mpg. I'm yet to do a good long run without the caravan to see what the mpg goes up to. I'm guessing it'll be high 30's?

_________________________________________


Sunday, 4 November 2018

Propshafts

So just before going to Devils Bridge, Wales, I found I needed to replace both Propshafts.

Saturday, 28 July 2018

Need to Make an Exhaust.

Need to Make an Exhaust.

My homemade exhaust fell off on my way home from Sixpenny Handley.
It had been on for around two years, but with vibration and engine shaking, it cracked and fell off.


I've made another one out of odd bits of an old exhaust pipe and I've used a bit of flexible pipe in between.
Hopefully, this will help stop the cracking and breaking.


We'll see how long this one lasts.


More to follow.